Battery switch on travel trailer function is crucial for managing your RV’s power. Understanding how to use your battery switch correctly is key to preventing electrical problems and ensuring you have power when you need it. This guide will walk you through the different types of switches, how to connect and disconnect your batteries safely, troubleshoot common issues, and maintain your system for optimal performance.
We’ll cover everything from basic operation to advanced troubleshooting techniques, empowering you to confidently manage your travel trailer’s electrical system.
Whether you’re a seasoned RVer or a first-timer, grasping the nuances of your battery switch is essential for a smooth and enjoyable camping experience. From understanding the various types of switches available (single, dual, rotary) to performing basic maintenance, this guide will provide you with the knowledge and confidence to keep your travel trailer’s power flowing.
Connecting and Disconnecting Batteries: Battery Switch On Travel Trailer Function
Connecting and disconnecting your RV’s house and chassis batteries correctly is crucial for safe and reliable operation. Improper connections can lead to power issues, damage to your batteries, and even fire hazards. This section will guide you through the process, emphasizing safety and best practices.
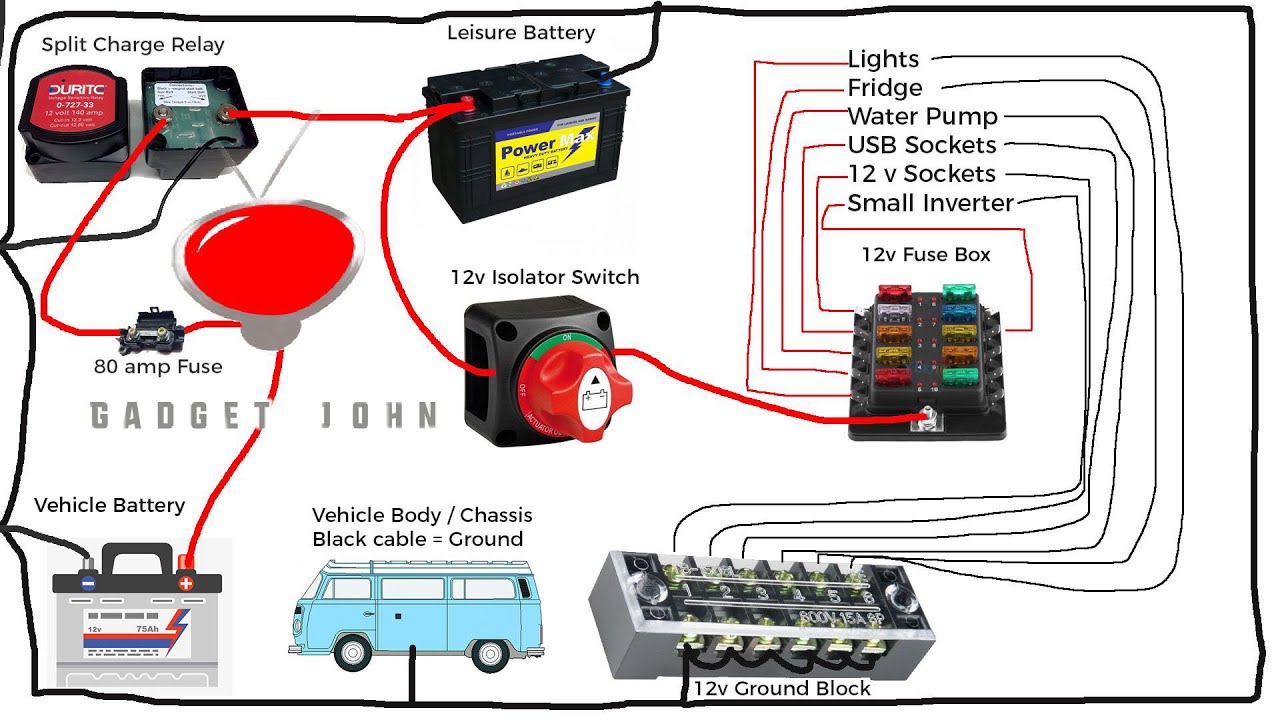
Connecting the house battery to the chassis battery usually involves a battery disconnect switch and appropriately sized wiring. This allows you to power your RV’s house systems (lights, appliances, etc.) while the vehicle is running, or even while using a generator, charging the house battery. Disconnecting the batteries is often necessary for maintenance, storage, or in case of emergency.
Connecting House and Chassis Batteries
The process typically involves turning off the battery disconnect switch, then carefully connecting the positive (+) and negative (-) terminals of the house battery to the appropriately sized wires leading to the chassis battery or charging system. Ensure the connections are clean and tight. Always connect the positive (+) terminal first, then the negative (-). When reconnecting, reverse the order: negative first, then positive.
So, you’re planning a trip? Awesome! First things first: get travel insurance. Check out Aon travel insurance for some solid options; they’ve got various plans to suit different needs. And speaking of trips, if you’re taking your travel trailer, make sure you understand the battery switch on travel trailer function – it’s crucial for keeping your lights and appliances running smoothly.
Knowing how to manage your power is key for a comfortable and hassle-free adventure!
Double-check all connections for security before turning the battery disconnect switch back on.
Disconnecting House and Chassis Batteries
To disconnect the batteries, reverse the connection process. First, turn off the battery disconnect switch. Then, carefully disconnect the negative (-) terminal, followed by the positive (+) terminal. Make sure the connections are secure and there’s no risk of accidental contact. This prevents shorts and potential sparks.
Remember to always disconnect the negative terminal first.
Maintaining Battery Connections
Proper maintenance of your battery connections is essential to prevent corrosion and ensure reliable power. Corrosion buildup can impede current flow and reduce battery life.
Regularly inspect your battery terminals for corrosion. A whitish, green, or blue powdery substance indicates corrosion. To clean the terminals, you can use a wire brush or terminal cleaner to remove the corrosion. Apply a corrosion inhibitor or a thin layer of dielectric grease to the terminals after cleaning to help prevent future corrosion. This helps protect the connections from moisture and other environmental factors.
Safety Precautions When Working with RV Batteries
RV batteries contain corrosive acid and can release flammable hydrogen gas. Always take the necessary precautions when working with them:
- Wear safety glasses or goggles to protect your eyes from splashes of battery acid.
- Work in a well-ventilated area to avoid inhaling hydrogen gas.
- Never allow sparks or open flames near the batteries.
- Wear gloves to protect your hands from acid and corrosion.
- Have baking soda and water on hand to neutralize any spilled battery acid.
Tools Needed for Battery Maintenance and Connection, Battery switch on travel trailer function
Having the right tools makes battery maintenance easier and safer.
- Wire brush or terminal cleaner
- Wrench (appropriate size for your battery terminals)
- Dielectric grease
- Safety glasses or goggles
- Gloves
- Baking soda and water (for neutralizing spilled acid)
Troubleshooting Common Battery Switch Issues
Your travel trailer’s battery switch is a crucial component, connecting and disconnecting your house batteries from the charging sources. Problems with this switch can lead to frustrating power outages or a complete lack of electricity. Understanding common issues and troubleshooting steps will help you quickly diagnose and fix these problems.
Common Battery Switch Problems and Troubleshooting
Several issues can arise with your battery switch. The most frequent problems are a complete lack of power to the trailer’s systems or intermittent power, flickering lights, and appliances that only work sometimes. These issues often stem from a faulty switch, corroded connections, or problems with the wiring.
- No Power: This usually indicates a problem with the switch itself, its connections, or a blown fuse in the switch’s circuit. First, visually inspect the switch for any obvious damage or loose wiring. Check the fuses both in the switch and in your trailer’s main fuse panel. If the fuses are intact, try toggling the switch several times. If the problem persists, test the voltage at the switch terminals to confirm whether power is reaching the switch.
If no voltage is present, trace the wiring back to the power source to identify a break in the circuit. If voltage is present at the terminals but no power at the output, the switch is likely faulty and needs replacement.
- Intermittent Power: This points to loose connections, corroded terminals, or a failing switch. Begin by carefully inspecting all connections at the switch and battery terminals for corrosion. Clean any corroded terminals with a wire brush and apply a corrosion inhibitor. If corrosion is the issue, the intermittent power should resolve. If not, the switch itself may be failing internally, requiring replacement.
A failing switch can create inconsistent contact, leading to this intermittent behavior.
Troubleshooting Flowchart
Imagine a simple flowchart. It would start with the problem: “No Power/Intermittent Power.” The first step would be to visually inspect the battery switch and connections. If you find a problem (loose wire, corrosion), fix it and test. If the problem persists, check the fuses. If a fuse is blown, replace it and test.
If the fuses are good, test for voltage at the switch terminals. If no voltage, trace the wiring back to the source. If voltage is present, the switch itself is likely faulty and requires replacement.
Examples of Faulty Switch Causing Electrical Problems
Scenario 1: Imagine you arrive at your campsite and find that none of your trailer’s lights or appliances are working. You’ve checked your batteries and they have sufficient charge. After carefully inspecting your wiring, you find no obvious issues. The culprit? A faulty battery switch preventing power from reaching your trailer’s electrical system.Scenario 2: Your refrigerator in the trailer works sporadically.
Sometimes it cools perfectly; other times, it doesn’t work at all. After eliminating other possible causes (like a faulty compressor or low refrigerant), you discover corrosion on the terminals of your battery switch. Cleaning the terminals resolves the intermittent operation of your refrigerator.
Battery Switch and Electrical System Integration
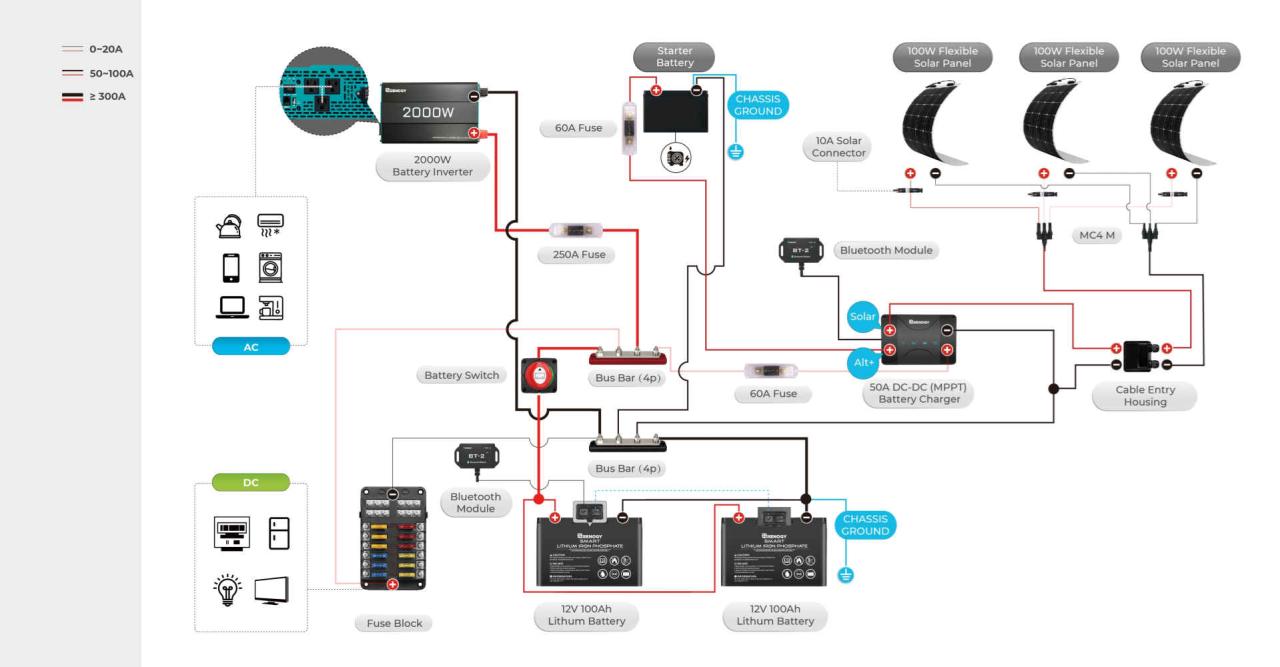
Your travel trailer’s battery switch is the central control point for your 12V DC power system, acting as a crucial link between your batteries and the rest of your electrical components. Understanding its interaction with other parts of the system is vital for efficient power management and troubleshooting. This section will detail the relationship between the battery switch and key electrical components, highlighting the effects of different switch configurations on system performance and power distribution.The battery switch doesn’t operate in isolation; it’s integrated into a network involving your batteries, converter, inverter, and various appliances.
The converter transforms 12V DC power from your batteries into 120V AC power for household appliances. The inverter performs the opposite function, converting 12V DC to 120V AC, usually for higher-power demands. The battery switch determines which power source (house batteries or shore power) feeds these components and, ultimately, your appliances.
So, you’re planning a trip? Awesome! First things first: get travel insurance. Check out Aon travel insurance for options; they’ve got you covered for most eventualities. Then, if you’re hitting the road in an RV, knowing how the battery switch on travel trailer function works is super important – it’ll save you a lot of headaches (and potentially a dead battery!).
Make sure you understand both before you leave!
Battery Switch Configurations and System Performance
Different battery switch configurations directly impact system performance. A simple on/off switch provides basic control, but more sophisticated switches (like those with multiple positions, including “off,” “battery,” “both,” and “shore”) offer greater flexibility and safety. A switch with a “both” position allows you to charge your house batteries while simultaneously running appliances from either the batteries or shore power.
This is ideal for boosting battery charge while using appliances. In contrast, a simple on/off switch limits you to running appliances directly from your batteries or shore power, but not both simultaneously. This means your batteries might not charge while using shore power. The “shore” position only allows power from the campground’s electricity to flow through the system.
This is useful for conserving battery power when you have access to shore power.
Power Distribution and the Battery Switch
The battery switch acts as a gatekeeper, controlling the flow of electricity to various appliances and systems. When the switch is in the “battery” position, power flows directly from your house batteries to the 12V DC circuits powering lights, water pumps, and other DC appliances. In the “shore” position, the power from the external shore power source flows through the converter, providing 120V AC power to your AC appliances.
The “both” position allows charging of the batteries from shore power and operation of 12V and 120V appliances. This configuration is beneficial for extending battery life and ensuring continuous power.
Diagram of Electrical System Flow
Imagine a diagram: At the top, we have two house batteries connected in parallel (+ to +,
to -). From the positive terminal of this battery bank, a wire leads down to the battery switch. The battery switch has four positions
OFF, BATTERY, BOTH, and SHORES. From the output of the battery switch, we have several pathways. One path leads to a 12V DC fuse panel, distributing power to various 12V appliances (lights, pump, etc.). Another path leads to the converter. The converter takes the 12V DC input and transforms it into 120V AC, which then goes to a 120V AC breaker panel, powering your AC appliances (air conditioner, microwave, etc.).
A separate wire from the shore power inlet feeds into the 120V AC breaker panel. This wire is also connected to the battery charger within the converter. A final pathway from the battery bank leads to an inverter (if present), which converts 12V DC to 120V AC for specific appliances. The crucial element here is the battery switch, which controls the flow of power from the batteries to the rest of the system, depending on the selected position.
The diagram visually represents how the switch acts as a central control point, directing power based on its selected position. The lines representing the wires visually connect the different components, illustrating the flow of electricity. The different symbols for batteries, switches, fuses, and panels enhance clarity and understanding of the electrical system’s layout.
Battery Switch Maintenance and Replacement
Keeping your travel trailer’s battery switch in top condition is crucial for reliable power. Regular maintenance prevents problems and extends the lifespan of your switch, saving you time and money in the long run. Neglecting maintenance can lead to premature failure and potentially leave you stranded without power.Regular maintenance involves a simple yet effective schedule to ensure optimal performance and longevity of your battery switch.
This proactive approach helps avoid costly repairs and ensures a smooth power supply for your RV adventures.
Regular Maintenance Schedule
A yearly inspection and cleaning is recommended. This involves visually inspecting the switch for any signs of corrosion, loose connections, or damage. Clean the terminals and connections with a wire brush and baking soda solution to remove any corrosion build-up. Lubricate moving parts with a dielectric grease to ensure smooth operation. More frequent inspections (every 6 months) might be necessary in harsh environments, such as coastal areas with high humidity or areas with significant dust accumulation.
Testing the switch functionality by turning it on and off several times is also advisable during each inspection.
Replacing a Faulty Battery Switch
Replacing a battery switch is a straightforward process, but it’s essential to disconnect the battery before starting any work to prevent electrical shocks. First, locate the switch, usually near the battery bank. Take photos of the wiring before disconnecting anything to aid in reassembly. Carefully disconnect all wires from the switch, noting their positions. Unscrew the switch from its mounting bracket.
Install the new switch, ensuring it’s securely fastened. Reconnect the wires, referring to your photos or notes. Finally, test the switch to ensure it functions correctly. Remember to always consult your travel trailer’s wiring diagram for specific instructions.
Selecting a Replacement Battery Switch
Choosing the right replacement switch is vital. The new switch must have the same amperage rating as the original to avoid overloading the system. Check the switch’s voltage rating; it should match your battery system (typically 12V). Consider the switch’s mounting style to ensure it fits your existing setup. Some switches offer additional features like integrated fuses or circuit breakers for enhanced safety.
It’s advisable to purchase a replacement switch from a reputable RV parts supplier to ensure quality and compatibility.
Causes of Premature Battery Switch Failure
Several factors can contribute to premature battery switch failure. Addressing these issues can significantly extend the lifespan of your switch.
- Corrosion on terminals and connections: Corrosion restricts current flow, generating heat and ultimately damaging the switch.
- Loose connections: Loose wiring creates intermittent contact, leading to arcing and overheating.
- Overcurrent: Drawing more current than the switch is rated for will overload it, causing damage.
- Exposure to the elements: Moisture and extreme temperatures can corrode the switch and its components.
- Mechanical damage: Physical impacts or vibrations can damage the switch’s internal components.
- Inferior quality switch: A poorly made switch may fail prematurely due to subpar materials or manufacturing defects.
Mastering your travel trailer’s battery switch is more than just flipping a switch; it’s about understanding your RV’s electrical system and ensuring reliable power for your adventures. By following the safety precautions, troubleshooting tips, and maintenance advice Artikeld in this guide, you’ll be well-equipped to handle any electrical situation and enjoy worry-free camping. Remember, regular maintenance is key to preventing problems and extending the life of your battery switch and other components.
So, get out there and enjoy the open road!
Question & Answer Hub
What happens if I leave my battery switch on all the time?
Leaving your battery switch on constantly can drain your batteries, especially if you’re not using your RV for extended periods. It’s best to turn it off when not in use.
How often should I check my battery connections?
Inspect your battery connections at least every three months, or more frequently if you notice any signs of corrosion or loose connections.
Can I use any type of battery switch in my travel trailer?
No, you should use a battery switch that’s compatible with your RV’s electrical system’s amperage and voltage. Check your owner’s manual for specifications.
My battery switch is making a clicking sound. What’s wrong?
A clicking sound often indicates a problem with the switch itself or a low battery voltage. Check your battery levels and consider replacing the switch if the problem persists.
